Mounting and Data Collection
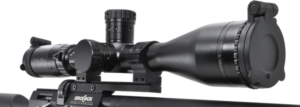
Be sure the rifle is unloaded and pointed in a safe direction. Mount your scope to your rifle.
TIP: You will want to leave as much elevation adjustment (turning the turret counter clockwise) as possible. When sighting in, turn the elevation turret clockwise to the lower 25% of adjustment and bring the scope to zero using height adjustable rings or a 20 MOA base.
Sight in your rifle and note if you have one zero or two. Measure muzzle velocity and measure from the centerline of the scope to the centerline of the barrel
Calculate Ballistics
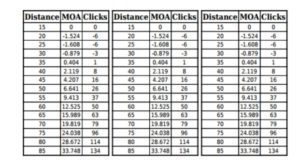
Use the data you collect and create a MOA range card using you favorite ballistics software, spreadsheet or visit the shooting range and make your own.
Note: When specifying maximum range, please make sure that the drop at this distance will not be more than 30 MOA if you have 5-30×50 and 42 MOA if you have 3-18×50.
Click the tape above to see examples
Download a blank template (at the bottom of this page) and using a graphics package (or a Sharpie®), add your data. Print and cut out. We recommend using an outdoor glossy label paper for printing.
Tip: Plain paper works to and is good to practice with until your tape is just right.
Tip: If you don’t have a graphics package installed, no problem. For Google Chrome browsers install the Google Drawings App® For Microsoft® users try Paint or one of the many free Apps available from the Microsoft Store.
Access the Tape Carrier
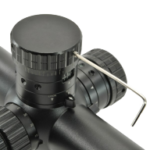
Be sure the rifle is unloaded and pointed in a safe direction. Note where your zero is on on the factory tape or make a small mark. Loosen the set screws in the turret cap (wrench is provided) and remove the cap.
TIP: You do not need to completely remove the screws.
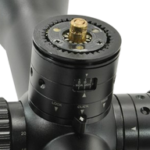
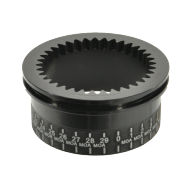
Remove the collar (tape carrier) by grasping it from the outside edges and lift upward.
Collar shown with preprinted aluminum ring
A spare collar is provided with the rifle scope should you ever want to choose to return to the factory MOA tape. The pre-printed numbers on the collar are printed on a thin aluminum ring. Removing this ring will allow for a thicker paper media to be used. The spare collar may already have this removed. Apply your custom tape in alignment to your marked zero.
Return the Tape Carrier
Return the collar making sure it is aligned with your zero. Replace the turret cover aligning the zero also and gently re-tighten the set screws
TIP: Be sure not to over tighten the screws!
Templates
Use Template A if you have two zeros, use template B is you have one zero
3-18×50 A templates click here
3-18×50 B templates click here
5-30×50 and 10×44 A templates click here
5-30×50 and 10×44 B templates click here
